Creality Ender 3 S1/Pro/Plus Acrylic Enclosure Case Box Tent Cover Kit
Regular price
$330.00
Sale
Fits all Ender 3 S1 Models
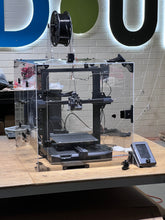
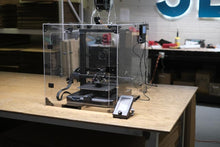
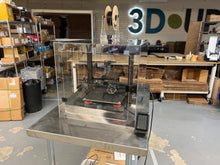
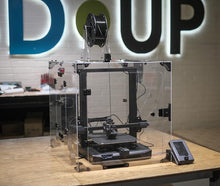
The Ender 3 S1 adds yet another line of Ender 3 computers, this time all with direct drive. To make sure you get quality prints while protecting your family's lungs we custom-designed an enclosure box/case for each Ender 3 S1 variation.
Be Sure to Pick the Right Enclosure!
There are now two separate lines of Ender 3D printers: the original model now on version 2, and the S1 line. If you have an original Ender 3 or variation please check out the other product listing. This product is specifically for the Ender 3 S1 models.
The Ender S1, Ender 3 S1 Pro, Ender 3 S1 Plus all share the Ender 3 S1 moniker but are very different printers, and so have different enclosure designs. The Ender 3/Pro V1 and Max both have an externally mounted power supply that can be easily moved to the outside of the enclosure, while the V2 has a self-contained power supply that requires a vent. The "Pro" version uses the same enclosure as the regular, so if you have an Ender 3 Pro V1 then select "V1". If you have the newer Ender 3 Pro V2 choose "V2".
Each variation also has a different electronics case with different airflows, and thus we had to design different vents. The Ender 3 S1 has vents on the front and right panels, the Ender 3 S1 Plus has left and right vents, and the Ender 3 S1 Pro has a single vent on the right side.
Ender 3 S1 |
Ender 3 S1 Pro |
Ender 3 S1 Plus |
 |
 |
 |
Features:
- Each enclosure is designed by purchasing the exact model of 3D printer, taking it apart, reverse engineering the airflow, followed by extensive in-house testing.
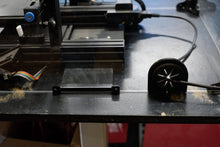
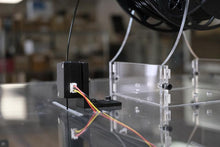
- A custom mount and extender cable to move the power supply outside of the enclosure (V1 and Max) or a power supply cooling vent for the V2 model.
- Cooling vents for the electronics. (V2, S1 and Max)
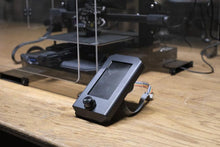
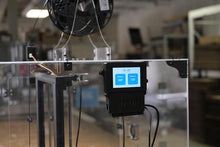
- The control panel is outside the enclosure so you can make changes to the print without having to open the doors. (V2, S1 and Max)
- Power Supply Airflow
Motherboard Airflow
Advantages of adding a 3D UPfitters enclosure:
- Better quality prints because the ambient temperature is controlled
- Keeps the power supply cool while the interior is hot enough for consistent prints with advanced material
- More flexibility to print different types of filaments, including ABS
- Optional fume filter or vent to the outside (both sold separately)
- Top quality American-made acrylic
The enclosure works by retaining the heat from the bed to bring the ambient temperature up high enough so that ABS and other filaments that expand when they cool are stabilized. If your main concern is the smell of melting plastic, it can be mitigated using an optional carbon filter. But if you are more interested in improving overall indoor air quality, a better solution is to vent to the outside via a hose. (not included). If you just want the highest possible enclosure temperature just put on the included air vent cover and it'll heat up as hot as possible.
A lot of customers prefer to print their own connector pieces themselves. We get it: you've got a great 3D printer, and it is itching to print things. No problem! The kit includes the STLs for all 3D printed parts. Typically it takes about 48 hours to print everything you'll need with a .4mm nozzle and .2mm layer height.
Print Your Own Connectors. Or Not.
On the other hand, if you purchase the optional connector kit, all parts are 3D printed in the best quality American-made ABS. It not only will withstand the heat year after year, but it's also one of the most rigid plastics to add that will make the enclosure sturdier. We proudly use the best ABS filament you can buy from Atomic Filament in Indiana.
DON'T USE PLA!
If you still want to print your own parts, just remember that temperatures inside an enclosure will melt PLA, so you will get the best results with printing parts in a high-quality ABS. The catch-22 is you need an enclosure to print ABS! If you don't already have an enclosure, you can make do with PETG. Just keep in mind that PETG is more flexible and will make the entire enclosure less rigid than if you had used ABS.
Pro Quality American Made Acrylic
The panels are made in a factory in Ohio and cut on an American-built industrial laser, and then flat-packed for your assembly. All you need for assembly is just a hex wrench and a small Philips head screwdriver. (not included.)
Acrylic Thickness
| Model | Description |
| All 3mm | The entry-level model has all 3mm acrylic and is a great option for a hobbyist on a budget. This model is not designed to store heavy items or pets on top of it. |
| 6mm Front, 3mm Sides | The thicker front on the most popular configuration makes the door operation much smoother and gives the entire enclosure a more solid feel. |
| All 6mm | If you want to gain a couple of degrees of heat retention, want to store items on top, or intend to move your enclosure around a lot you can't go wrong with the 6mm all-around option. |
Enclosure Dimensions
| Model | Width | Height | Depth | Vents |
| Ender 3 S1 | 22" | 21" | 31" | Front, Right Side |
| Ender 3 S1 Pro | 20" | 21" | 26" | Right Side |
| Ender 3 S1 Plus | 22" | 22" | 30" | Left Side, Right Side |
Includes
- 3mm or 6mm acrylic front panel with frame, doors, injection-molded hinges, magnetic latch, custom-designed latch mount in ABS, steel strike plates, and matching screws.
- 3mm or 6mm acrylic sides and top with access ports for cables and filament.
- There is no bottom. The enclosure is designed to sit on a flat surface that acts as a bottom.
- 5V 60x60mm fan Ender 3 V1/V2. (3D print a cover if you don't wish to vent.)
- 5V 80x80mm fan Ender 3 S1/Pro
- 140 screws, nuts, bolts, hinges, and miscellaneous parts.
Sold Separately
- DOES NOT INCLUDE THE 3D PRINTER!
- Does not include 3D printed parts unless specified at checkout
- DOES NOT INCLUDED the Acrylic spool holder
- Upgrade to an active charcoal filter and fan to reduce fumes.
- Upgrade the plastic knob to knurled steel.
- Put your logo on the front or sides!
- The outside venting system will send potentially dangerous and definitely odorous fumes outside. We supply the fan and 4" dryer hose adapter, you get the rest of the parts from your local hardware store.
- Interior LEDs
- Temperature gauge and custom holder
- Want something different? Request a custom modification.
Manuals


