Prusa Enclosure Mini+ Acrylic Box Case Cover Kit
Regular price
$260.00
Sale
The Prusa Mini was released in November of 2019 and was an immediate hit, with waiting times of months to get one. We were lucky enough to buy the first day and so only had to wait two months. The Mini itself is a wonder of engineering designed to reduce costs and increase reliability. The cantilevered hot end gets all of the attention, but the redesigned hot end with its custom integrated heat sink is both simpler and more effective than on its bigger MKS cousin.
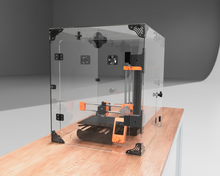
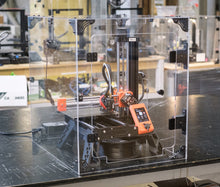
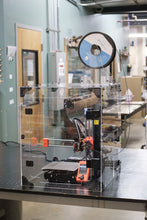
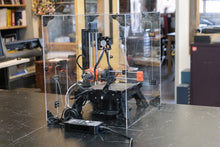
The only thing the Prusa Mini lacks is an enclosure to make full use of its capabilities, as well as retain the smells and air contaminates from melting plastics. This product is a professional-grade, cool-looking enclosure you can assemble in under an hour. This is the second version of this enclosure, recently updated to accommodate both the plain MINI and the Prusa MINI base.
Advantages of adding a 3DUPfitters enclosure:
- The controlled temperature creates better quality prints
- More flexibility to print different types of filaments
- Optional air filter or vent to the outside (both sold separately)
- Thick, quality acrylic
The enclosure works by retaining the heat from the bed to bring the ambient temperature up high enough, stabilizing ABS and other filaments that expand when they cool.
Side Access
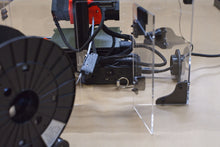
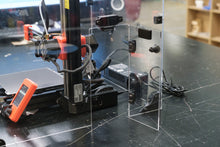
The biggest difference between this enclosure box/case/cover and the Prusa MKS enclosure is the addition of a side door. The Prusa Mini (without a base) is designed to feed filament through the Bowden tube on the side, and the power switch and USB port are all there. To make access easy a side door is right where you need it. There's a gap on the edge of the door so that as the gantry moves up and down the filament has a slot for unrestricted access.
This video shows how the negative pressure keeps a steady stream of air coming into the enclosure where it blows VOCs and other harmful particles out through a vent or air filter. Then the hot end moves up so you can see how the filament isn't impeded by the enclosure.

Mini Base Support
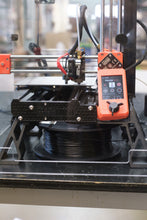
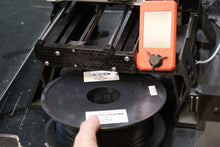
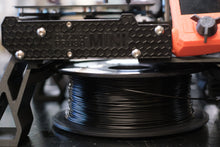
We've got 4 Prusa MINIs running 24/7 at 3D Upfitters, and the only thing keeping them from being a perfect print farm machine was the side loading filament. Thankfully Prusa designed a new base with filament spool storage underneath, which was a big improvement. Still, it took four iterations of different changes to the enclosure before I was happy with it.
It's not just a matter of making the enclosure taller to accommodate the base. It has to support both the Prusa with and without the base, which still makes it easier to slide the filament spools underneath.
I ended up lowering the front door scoop was to make it easier to insert the filament and making the entire enclosure a little larger to accommodate the wires that can stick out at odd angles. Those customers who don't care for the base can still feed the filament through the side door.

3D Print Your Own Parts. Or Not.
A lot of customers prefer to print their own connector pieces themselves. We get it: you've got a great 3D printer, and it is itching to print things. No problem! The kit includes the STLs for all 3D printed parts. Typically it takes about 48 hours to print everything you'll need with a .4mm nozzle and .2mm layer height.
On the other hand, if you purchase the optional connector kit, all parts are 3D printed in the best quality American-made ABS. It not only will withstand the heat year after year, but it's also one of the most rigid plastics to add that will make the enclosure sturdier. We proudly use the best ABS filament you can buy from Atomic Filament in Indiana.
DON'T USE PLA!
If you still want to print your own parts, just remember that temperatures inside an enclosure will melt PLA, so you will get the best results with printing parts in a high-quality ABS. The catch-22 is you need an enclosure to print ABS! If you don't already have an enclosure, you can make do with PETG. Just keep in mind that PETG is more flexible and will make the entire enclosure less rigid than if you had used ABS.
Pro Quality American Made Acrylic
The panels are made in a factory in Ohio and cut on an American-built industrial laser, and then flat-packed for your assembly. All you need for assembly is just a hex wrench and a small Philips head screwdriver. (not included.)
Note: The Mini comes with a nice spool holder so one is NOT included in this kit.
Acrylic Thickness
| Model | Description |
| All 3mm | The entry-level model has all 3mm acrylic and is a great option for a hobbyist or someone new to 3D printing. The 3mm top is not sturdy enough for storage, cats, children, etc. |
| 6mm Front, 3mm Sides |
The most popular model has a 6mm front and 3mm sides. The thicker front means a smoother door operation and a more sturdy feel overall. This is what we use in our print farm. |
| 6mm Front and Top, 3mm Sides | This configuration works great for customers who expect more heavy use such as libraries or schools, or if you want to store items on top of the enclosure. |
| All 6mm | If you want to gain a couple of degrees of heat retention or intend to move your enclosure around a lot you can't go wrong with the 6mm all-around option. |
Kit Includes
- Enclosure Dimensions: 20" (Deep), 16.5" (Wide), 20" (Tall), 13 lbs.
- Fits the Prusa Mini ONLY
- Acrylic front panel with frame, doors, injection-molded hinges, magnetic latch, custom-designed latch mount in ABS, steel strike plates, and matching screws.
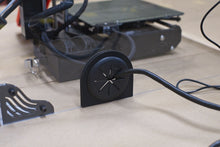
- Acrylic sides and top with access ports for cables and filament. There is no bottom. The enclosure is designed to sit on a flat surface that acts as a bottom.
- 60x60mm 12.6 CFM USB-powered fan. 3D print a cover if you don't wish to vent. (USB power supply not included.)
- Hundreds of screws, nuts, bolts, all connecting plastic pieces, and miscellaneous parts.
Not Included
-
3D printed parts must be selected as an option
- 3D UPfitters spool holder not included
Are you desperate enough to read the Installation Manual?


